Booting an older Mac from an external drive? Use an SSD, not a hard drive
Installing Catalina or later on an external hard drive can end in a “Your computer restarted because of a problem” loop. Here's why the change in how macOS lays out its disk makes an SSD essential, and how to set one up.
Running macOS from an external drive is a great way to try a newer version without touching your main disk, or to keep an older version around for software that needs it. But if that drive is a spinning hard disk, you may be in for a frustrating afternoon.
We found this out first hand. We were upgrading a Mac from Mojave to Catalina on an external hard drive, and part-way through the installation the Mac crashed and restarted to this screen:
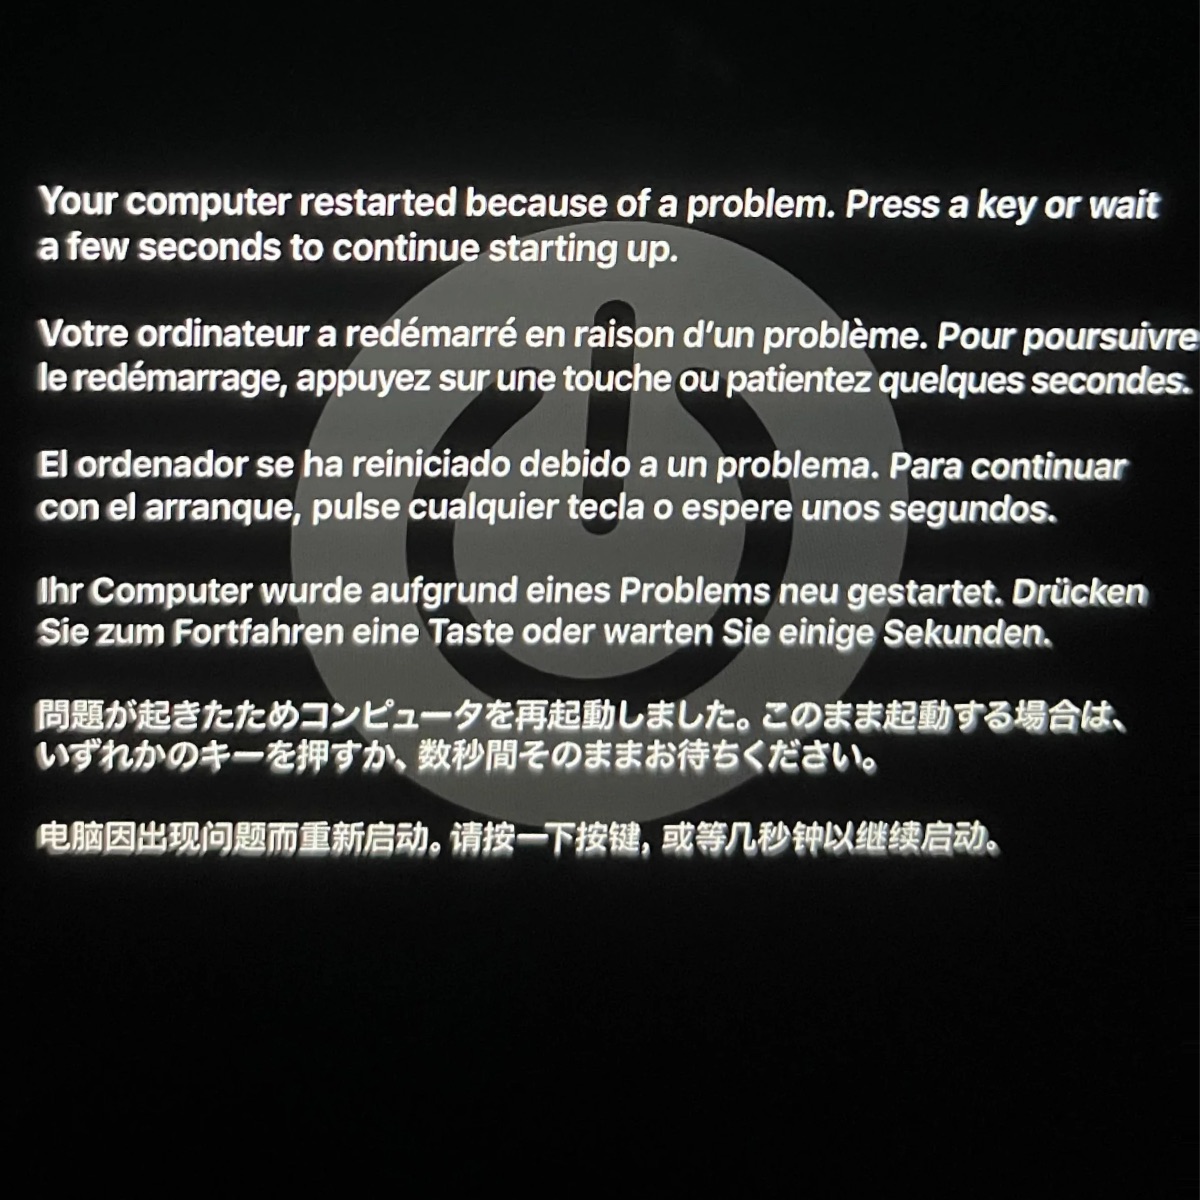
Every retry ended the same way, with the installer never finishing. Moving to an external SSD fixed it straight away, and the new system was dramatically faster too.
What that error means
That multilingual message is macOS's kernel panic screen. A kernel panic happens when the core of the operating system hits a problem it can't safely recover from, so it restarts the Mac. Apple's help page on unexpected restarts says faulty software is the usual cause, but damaged or incompatible hardware, including external devices, can also trigger one.
During an installation, the startup disk is under constant heavy load. If it can't keep up, the installer can stall or the system can panic, and you end up in a restart loop.
If you're seeing this screen while installing to an external hard drive, try the same installation on an SSD before you spend hours on other fixes.
What changed in Catalina
Up to Mojave, macOS lived on a single volume. Catalina split it in two. The operating system now sits on a read-only system volume, and your files and apps live on a separate Data volume. In the Finder the two appear as one “Macintosh HD”, but underneath they're a linked pair of volumes inside one APFS container. A normal Catalina startup disk actually holds at least five APFS volumes, including Preboot, Recovery and VM.
That layout depends on APFS, the Apple File System. Installing or upgrading means creating and rearranging those volumes, then writing many thousands of small files across them. Every version since Catalina works the same way, and Big Sur went further by cryptographically sealing the system volume.
Why hard drives struggle with APFS
APFS was designed for flash storage. It uses a technique called copy-on-write: instead of changing data in place, it writes a new copy and updates its records. On an SSD that costs almost nothing. On a hard disk, the file system's own records end up scattered across the platter, so the drive head spends its time seeking back and forth instead of reading.
Howard Oakley of The Eclectic Light Company has documented this in detail. He cites testing by Mike Bombich (the developer of Carbon Copy Cloner), which found APFS hard disks start out slower than the older Mac OS Extended format and get steadily slower as files are added. His long-standing advice is that APFS on a hard disk is fine for archives and Time Machine backups, but not for something busy like a startup disk.
A macOS install is about as busy as a disk gets. Add a USB connection on top, which slows an already slow drive further, and the installer can run painfully slowly or fail outright, which is what happened to us.
Apple's own guidance points the same way. Its article on using an external storage device as a Mac startup disk recommends APFS “especially if your storage device is a solid-state drive (SSD)”.
Choosing an external SSD
- Match the connection to your Mac. Macs from around 2012 onward have USB 3 or Thunderbolt, and a USB 3 SSD will feel faster than many older Macs' internal drives. On a USB 2 Mac (roughly 2011 and earlier), even an SSD tops out at around 35–40 MB/s. It's still a big improvement over a hard disk for the many small reads macOS does, but don't expect miracles.
- Either a ready-made portable SSD or a SATA SSD in a USB enclosure works. For older Macs, a 2.5-inch SATA SSD in a USB 3 enclosure is cheap and reliable, and you can move the SSD inside the Mac later.
- Size: 250 GB is enough for macOS and a few apps. Get 500 GB or more if you'll keep your files on it too.
Setting it up
- Make sure your Mac supports the version you want. Check it in the Mac lookup.
- Open Disk Utility and choose View › Show All Devices. Select the SSD itself (the top-level device, not a volume under it) and click Erase. Choose APFS and GUID Partition Map. This deletes everything on the drive.
- Get the full installer for your version from its page on this site, for example Catalina. Run it and click Show All Disks to pick the external SSD.
- Intel Macs with the Apple T2 Security Chip (most 2018–2020 models) block external startup disks by default. Turn on Allow booting from external or removable media in Startup Security Utility first, as Apple describes in the startup disk article above.
- To start up from the SSD, restart while holding ⌥ Option and choose it. Or set it permanently in System Preferences › Startup Disk.
Got an old hard drive spare?
Don't throw it away. Hard disks are still a good, cheap choice for Time Machine backups and archives. You can also use one for High Sierra or earlier, which work happily on Mac OS Extended (Journaled). For running Catalina or later, though, use an SSD. It will save you hours.
And if your older Mac still has its original internal hard drive, swapping it for a SATA SSD is often the best upgrade you can give it. For many Macs from 2008 to 2012, it's a straightforward job with plenty of step-by-step guides online. Find more help on our useful links page.